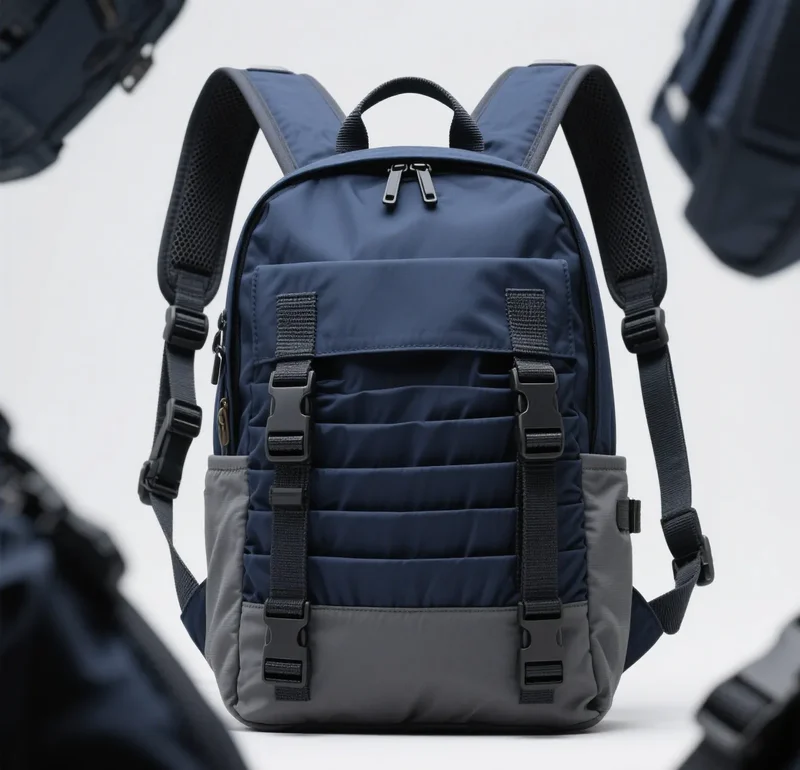
If you have ever picked up a tactical backpack and wondered what those rows of nylon webbing on the outside are actually for, you are not alone. The MOLLE system is one of the most important innovations in load-carrying gear, yet many users never fully understand how it works, what it is capable of, or how to take full advantage of its modular design philosophy. This comprehensive guide explains the MOLLE system from the ground up, covering its history, how the attachment mechanism functions, what accessories are compatible, and how to configure your tactical backpack for maximum effectiveness in any scenario you might face.
Understanding MOLLE is not just academic knowledge. When you know how the system works at a fundamental level, you can make smarter purchasing decisions about tactical packs and accessories, configure your gear more effectively for specific missions or activities, and troubleshoot attachment problems that arise in the field. Whether you are a military professional, a law enforcement officer, an outdoor enthusiast, or a civilian prepper, mastering the MOLLE system will transform how you use your tactical backpack.
The History and Development of MOLLE
To understand why MOLLE works the way it does, it helps to know the problems it was designed to solve. Before MOLLE, the U.S. military relied on the ALICE system, which used a complex arrangement of metal clips, wire frames, and canvas pouches. While ALICE was a significant improvement over previous systems, it had notable drawbacks: the metal clips were noisy, the system was not truly modular, and the individual components were not easily interchangeable between different packs and vests.
During the 1990s, the military began seeking a replacement that would offer true modularity, reduced noise signature, and compatibility across all load-bearing equipment. The result was MOLLE, which standardized the attachment interface across backpacks, plate carriers, battle belts, and chest rigs. The key insight was deceptively simple: if every piece of gear used the same standardized attachment grid, then any pouch could be mounted on any platform, creating a universal ecosystem of interchangeable equipment.
The first MOLLE gear entered service with the U.S. Marine Corps in 1997 and was subsequently adopted by all branches of the U.S. military, NATO forces, and military organizations worldwide. The commercial market quickly followed, with tactical gear manufacturers incorporating MOLLE into consumer-grade backpacks, making the system accessible to law enforcement, outdoor enthusiasts, and civilian users. Today, MOLLE is the universal standard for tactical gear attachment, and the basic design has remained virtually unchanged since its introduction, a testament to the effectiveness of the original engineering.
Understanding the PALS Grid: The Foundation of MOLLE
The physical foundation of the MOLLE system is the PALS grid, or Pouch Attachment Ladder System. This grid consists of horizontal rows of one-inch-wide nylon webbing sewn onto the exterior surface of the backpack, vest, or belt. The rows are spaced at one-and-a-half-inch vertical intervals, and within each row, the webbing is stitched to the pack at one-and-a-half-inch horizontal intervals, creating a ladder-like pattern of loops.
The standardized dimensions are critical to the system's interoperability. Because every manufacturer uses the same webbing width, row spacing, and stitch interval, a magazine pouch made by one company will fit perfectly on a pack made by a completely different company. This universal compatibility is what makes MOLLE so powerful. You are not locked into a single brand's ecosystem. You can mix and match components from dozens of manufacturers and everything will work together seamlessly.
The number of PALS columns and rows varies by backpack model and manufacturer. A compact tactical daypack might feature a single panel of eight columns by four rows, providing 32 attachment points. A full-size military rucksack could have multiple panels totaling over 100 attachment points. Understanding your pack's grid dimensions helps you plan accessory placement and ensures you do not overload any single section of the webbing.
Traditional Sewn MOLLE vs. Laser-Cut MOLLE
Traditional MOLLE uses separate nylon webbing strips that are sewn onto the pack fabric. This method has been the standard for decades and offers excellent strength and durability. The sewn webbing adds structural rigidity to the pack walls, and the attachment points can handle substantial loads without deformation. The trade-off is added weight and a slightly bulkier profile, as the webbing strips create raised ridges on the pack surface.
Laser-cut MOLLE, also called cut MOLLE or precision-cut MOLLE, represents a newer manufacturing approach. Instead of sewing separate webbing strips, the manufacturer uses precision lasers to cut the attachment slots directly from the pack fabric. The result is a smooth, low-profile surface that is lighter and less bulky than traditional sewn MOLLE. Laser-cut MOLLE has become increasingly popular on modern tactical packs because it maintains full compatibility with standard MOLLE accessories while reducing weight and presenting a cleaner aesthetic.
The strength difference between the two approaches is minimal for typical use cases. Traditional sewn MOLLE can handle slightly more weight at each attachment point, typically supporting 30 to 50 pounds per row. Laser-cut MOLLE generally supports 20 to 35 pounds per row. For most accessories weighing less than 10 pounds, both approaches provide more than adequate holding strength. However, if you plan to mount particularly heavy items like large hydration bladder carriers or tool pouches filled with dense equipment, traditional sewn MOLLE offers a meaningful safety margin.
How MOLLE Attachment Works: Step by Step
Attaching a MOLLE accessory to your tactical backpack is straightforward once you understand the mechanism. Most MOLLE-compatible pouches come with one or more MOLLE straps, which are narrow nylon webbing strips with a snap fastener at one end. Here is the attachment process:
First, align the pouch with the desired position on the PALS grid. Each pouch typically occupies a specific number of PALS columns, such as three columns wide for a standard magazine pouch or five columns wide for a larger utility pouch. Ensure the pouch sits straight and that the MOLLE straps on the back of the pouch align with the gaps in the PALS grid.
Next, take each MOLLE strap and thread it vertically through the horizontal rows of webbing on the pack. The strap passes up through the gap below the target row, over the webbing, and down through the gap above. Then continue the strap down to the bottom of the pouch where it threads through the corresponding attachment loop on the pouch backing.
Finally, pull the strap tight and secure it by snapping the fastener to itself. The strap should be snug but not so tight that it distorts the PALS webbing. Repeat this process for each MOLLE strap on the pouch. A properly attached pouch should be firmly secured with no noticeable wobble, and the attachment should feel solid when you apply moderate pulling force.
Alternative Attachment Methods
While the standard MOLLE strap with snap fastener is the most common attachment method, several alternatives exist. Malice clips are rigid plastic clips that provide a more secure attachment than fabric straps and are faster to install and remove. They are particularly popular among military users who need to reconfigure gear quickly in the field.
Speed clips and quick-release buckles offer even faster attachment and detachment, though they may add slight bulk and weight. Some accessories use elastic keepers or shock cord attachment systems that provide a more flexible mount with some shock absorption. Each method has trade-offs between security, speed, weight, and cost, and the best choice depends on your specific requirements and priorities.

Essential MOLLE Accessories for Your Tactical Backpack
The MOLLE ecosystem includes hundreds of accessory types from dozens of manufacturers. Here are the most common and practical categories to consider for your tactical backpack configuration.
Utility Pouches
General-purpose utility pouches come in various sizes from small three-by-three-inch versions to large pouches that occupy five or more PALS columns. They serve as catch-all storage for items that do not warrant a dedicated pouch, including gloves, snacks, batteries, cables, maps, and miscellaneous tools. Having at least one medium-sized utility pouch on your tactical backpack is recommended for virtually every user.
Medical Pouches
Dedicated first-aid pouches designed for MOLLE attachment are a critical safety accessory for any tactical pack. These pouches feature organized interiors with elastic loops for tourniquets, shears, chest seals, pressure dressings, and other medical supplies. The best medical pouches open flat for rapid access and use pull tabs for quick identification. Positioning a medical pouch in a consistent location across all your packs ensures you can find it by muscle memory under stress.
Hydration Carriers
While most tactical packs include an internal hydration sleeve, MOLLE external hydration carriers allow you to mount a water bladder on the exterior of the pack, freeing internal space and sometimes improving weight distribution. These carriers typically accommodate standard one-liter or two-liter soft bottles and attach using three or four MOLLE straps for secure mounting even during vigorous movement.
Administrative and Organizational Pouches
Small admin pouches with pen loops, card slots, and elastic organizers mount directly to the MOLLE grid, providing quick-access storage for frequently needed items like multitools, flashlights, notebooks, and communication devices. These small pouches are often the most-used accessories on a tactical pack because they keep critical items within immediate reach without opening the main pack.
Dump Pouches
Dump pouches are large, open-top bags that attach to the MOLLE grid and serve as temporary storage for items you need to remove quickly but cannot immediately stow in a more organized location. Military users employ dump pouches for spent magazines, while hikers might use them for collecting firewood or storing wet gear. They fold flat when not in use and expand to accommodate substantial volume when deployed.
Best Practices for MOLLE Configuration
Configuring your MOLLE gear effectively requires some strategic thinking. The goal is to place items based on how frequently you need to access them and how their weight affects the pack's balance and your comfort during carry.
Weight Distribution Principles
When attaching heavy items to MOLLE, prioritize the center of the back panel, closest to your spine. This placement keeps the load close to your body's center of gravity, reducing fatigue and improving stability during movement. Avoid mounting heavy items on the sides or bottom of the pack, as this creates leverage that pulls the pack away from your back and strains your shoulders unevenly.
Accessibility Planning
Items you need to access frequently should be mounted on the shoulder straps if your pack has strap-mounted MOLLE, on the upper back panel where you can reach them without removing the pack, or on the sides where you can swing the pack to one side for access. Items needed only in specific scenarios, like a medical pouch or emergency tools, should be placed in consistent locations so you can find them by muscle memory under stress.
Avoiding Overloading
It is tempting to fill every available MOLLE attachment point with accessories, but this approach leads to excessive weight, reduced mobility, and potential damage to the webbing. Be selective about what you mount externally. Each MOLLE-attached item adds weight and creates additional points of failure. Only mount items that genuinely need quick external access, and keep the total external load reasonable for your intended use.
Tips for Maintaining Your MOLLE System
MOLLE webbing and attachment straps are remarkably durable, but they do benefit from occasional maintenance. Inspect webbing regularly for fraying, UV damage, or stitching failures, especially if the pack is frequently exposed to direct sunlight. Nylon webbing degrades under prolonged UV exposure, though this process typically takes years of continuous sun exposure before it affects performance.
Keep the PALS grid clean by brushing out debris that accumulates in the weave. Sand, mud, and organic matter can work into the webbing and cause abrasion over time. If the webbing becomes stiff with dried mud or salt residue, rinse it with fresh water and allow it to air dry. Avoid using harsh chemicals or solvents that could damage the nylon fibers or compromise the pack's water-resistant coatings.
Conclusion
The MOLLE system is the backbone of modern tactical gear modularity, and understanding how it works gives you a significant advantage in configuring your tactical backpack for maximum effectiveness. From the standardized PALS grid dimensions that ensure cross-brand compatibility to the simple but effective strap attachment mechanism, every element of MOLLE has been proven in real-world military and law enforcement operations. By selecting the right accessories, following weight distribution best practices, and maintaining your equipment properly, you can build a tactical backpack configuration that is perfectly adapted to your specific needs and mission requirements.