Staying properly hydrated on the trail is not just about comfort. It is about performance, safety, and enjoyment. Dehydration degrades decision-making, reduces physical output, and can escalate from mild headache to life-threatening heat illness in extreme conditions. The hydration system you choose, how you carry water, and how you access it while hiking directly impact how much you drink and how well you perform.
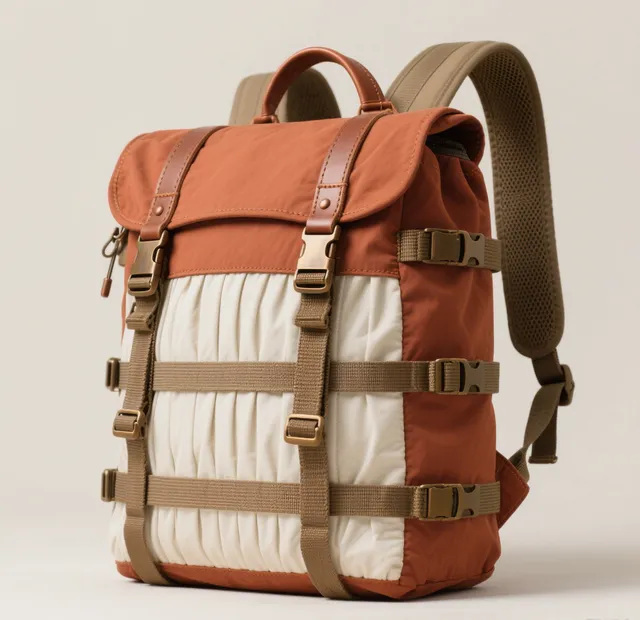
Most modern hiking backpacks are hydration-compatible, featuring a dedicated sleeve for a water bladder and a hose port for routing the drinking tube. But hydration-compatible does not mean you must use a bladder. Most packs also feature side pockets for water bottles, and many experienced hikers use a combination of both systems. This guide explores the bladder versus bottle debate in depth, helping you choose the right hydration strategy for your hiking style.
Understanding Hydration-Compatible Backpack Design
A hydration-compatible backpack includes specific features designed to integrate seamlessly with a water bladder system. Understanding these features helps you evaluate any pack you are considering.
The Hydration Sleeve
The hydration sleeve is a dedicated pocket or compartment inside the main pack body, typically positioned against the back panel. It is designed to hold a water bladder (also called a reservoir) snugly in place. The sleeve serves multiple purposes: it keeps the bladder secure so it does not shift during movement, it positions the water weight close to your spine for optimal balance, and it protects the bladder from puncture by other gear items.
Most hydration sleeves accommodate bladders in the 1.5 to 3 liter range. The sleeve opening is usually at the top of the pack, allowing you to slide the bladder in during packing. Quality sleeves include a hanging loop or clip at the top to secure the bladder and prevent it from sliding down as it empties.
The Hose Port
The hose port is a small opening in the pack body, typically near the top of the back panel, that allows the drinking tube to exit the pack and route over your shoulder. Well-designed hose ports include a secure closure (elastic, hook-and-loop, or clip) that holds the tube in place while preventing it from slipping back inside. Some packs offer multiple hose routing options, including shoulder strap clips that keep the tube accessible and prevent it from swinging.
Side Water Bottle Pockets
Even hydration-compatible packs with bladder sleeves should include side pockets for water bottles. These serve as backup water storage, provide easy access to bottles without opening the main pack, and allow you to carry bottles with electrolyte mixes or hot beverages. Quality side pockets use stretch mesh or elasticized fabric to grip bottles securely while allowing quick one-handed insertion and removal.
Hydration Bladders: The Hands-Free Option
Hydration bladders are flexible reservoirs that fit inside your pack and deliver water through a tube with a bite valve. They have become the standard hydration system for serious hikers, runners, and cyclists because they offer distinct advantages for active use.
Advantages of Hydration Bladders
- Hands-free drinking: You can drink while hiking without stopping, reaching for a pocket, or unscrewing a cap. Simply bite the valve and sip. This continuous access encourages more frequent drinking, which helps maintain better hydration throughout the day.
- Better weight distribution: The bladder sits against your back panel, keeping water weight close to your spine and centered. This improves balance and reduces the sway caused by water moving in side pockets.
- Space efficiency: A bladder conforms to the shape of your pack and fills dead space. Unlike rigid bottles, it shrinks as you drink, freeing up volume for other gear.
- Higher capacity: Most bladders hold 2-3 liters, which is more than typical side pockets can accommodate. For long hikes in hot conditions, the ability to carry 3+ liters in a single reservoir is valuable.
- Reduced pack opening: You do not need to open your pack to access water, which saves time and keeps your gear protected from rain and debris.
Disadvantages of Hydration Bladders
- Cleaning difficulty: Bladders are harder to clean than bottles. The interior is dark and difficult to inspect, and the tube can harbor mold and bacteria if not properly maintained. Regular cleaning with specialized brushes and drying protocols is essential.
- Freezing risk: In cold weather, the drinking tube can freeze, rendering the system unusable. The thin water column in the tube freezes faster than the larger volume in the bladder itself.
- Leak potential: Bladders can leak at the cap, the tube connection, or the bite valve. A leak inside your pack can soak gear, clothing, and electronics. Quality bladders from reputable brands minimize this risk, but it is never zero.
- Lack of visibility: You cannot easily see how much water remains in a bladder. Many bladders have a window or you can feel the weight, but precise monitoring requires removing the bladder from the pack.
- Flavor retention: Some bladders retain a plastic taste, especially when new. Electrolyte drinks can leave residual flavors that affect subsequent plain water use. Thorough cleaning between uses helps but does not always eliminate the issue.
Water Bottles: The Classic Approach
Water bottles are the original hiking hydration solution and remain popular for good reason. They are simple, reliable, and easy to maintain. Modern bottles come in hard-sided (plastic or metal) and collapsible (soft-sided) varieties, each with distinct characteristics.
Advantages of Water Bottles
- Easy cleaning: Wide-mouth bottles can be cleaned thoroughly with a brush, inspected visually, and even run through a dishwasher. There are no hidden tubes or complex valve assemblies to worry about.
- Durability: Hard-sided bottles, especially stainless steel models, are nearly indestructible. They can be dropped, stepped on, and thrown in a pack without concern for punctures or leaks. Collapsible bottles are less durable but still simpler than bladders.
- Temperature versatility: Insulated stainless steel bottles keep water cold for hours and can even handle hot beverages. No bladder system offers this capability.
- Visual monitoring: You can see exactly how much water remains at a glance. Many bottles include volume markings on the side for precise tracking.
- Easy refilling: At water sources, you can quickly fill bottles without removing your pack or dealing with hose connections. If a source looks questionable, you can fill selectively and treat as needed.
- Flavor flexibility: You can dedicate different bottles to different drinks (water, electrolytes, coffee) without cross-contamination between flavors.
Disadvantages of Water Bottles
- Requires stopping to drink: You need to reach into a side pocket, unscrew the cap, drink, and replace the bottle. This interruption, while brief, discourages frequent sipping and can lead to under-hydration.
- One-handed operation difficulty: Some bottles require two hands to open, which is inconvenient while holding trekking poles or navigating technical terrain.
- Weight distribution issues: Water bottles in side pockets create asymmetric weight that can cause the pack to pull to one side, especially when only one side carries water.
- Limited capacity: Most side pockets hold 1-liter bottles, and larger bottles may not fit securely. Carrying more than 2-3 liters in bottles requires additional external attachment or internal space.
- Added pack access needed: When bottles are in side pockets and you wear a hip belt, accessing them becomes more difficult. You may need to remove the pack or contort to reach them.
Comparative Analysis: Bladder vs. Bottle
Hydration Volume and Frequency
Studies and field observations consistently show that hikers using bladders drink more water than those using bottles. The reason is simple: accessibility. When water is available at your mouth with zero effort, you sip constantly throughout the hike. When you must stop and reach for a bottle, you drink less frequently, even if each individual drink may be larger. For maintaining consistent hydration over long days, the bladder system wins.
Weight and Pack Balance
A 3-liter bladder weighs about 6.6 pounds when full, positioned against your back panel for optimal center-of-gravity. Equivalent water in three 1-liter bottles in side pockets creates lateral weight that shifts as you walk. The bladder provides better balance, especially as the water depletes gradually throughout the day.
Maintenance and Longevity
Bottles win decisively here. A stainless steel bottle lasts essentially forever with zero maintenance. A bladder requires regular cleaning, proper drying, and periodic replacement (typically every 1-3 years depending on use frequency). The tube and bite valve need attention and eventual replacement. If you tend to neglect gear maintenance, bottles are the more reliable choice.
Reliability in Extreme Conditions
In freezing temperatures, bottles win because they can be stored inside your jacket or sleeping bag to prevent freezing. Bladders in cold weather require insulated tube covers, blowing water back into the bladder after each sip, and constant vigilance. In extreme heat, bottles win if they are insulated, keeping water cool for hours while a bladder in a dark pack absorbs ambient heat.
The Hybrid Approach: Best of Both Worlds
Many experienced hikers have settled on a hybrid approach that combines a bladder with bottles. This leverages the strengths of both systems while mitigating their weaknesses.
A typical hybrid setup includes a 2-liter bladder as the primary drinking system for hands-free access during active hiking, plus one or two water bottles in side pockets for backup, electrolyte drinks, or camp use. At camp, you can remove the bottles without accessing the main pack. On technical sections where hands-free drinking is most valuable, the bladder provides effortless hydration. If the bladder fails or freezes, you have bottles as a backup.
This approach adds the weight of both systems, but since the bottles typically contain 1 liter or less, the penalty is modest. The redundancy and flexibility make it the preferred setup for multi-day trips and challenging conditions.
Choosing the Right Bladder
If you decide to use a bladder, selecting the right one matters. Key considerations include:
- Capacity: 2-3 liters is the standard range. Choose based on your typical water needs and pack sleeve size.
- Opening type: Slide-cap openings are easy to use but can leak if not sealed properly. Screw-top openings are more secure but slower to fill. Wide-mouth designs are easier to clean and fill.
- Tube and bite valve: Look for a quick-disconnect fitting that allows you to detach the tube for cleaning. The bite valve should open easily and close reliably without dripping.
- Material: Most bladders use BPA-free TPU or PEVA. TPU is more durable and resistant to taste transfer but costs more. PEVA is lighter and cheaper but may retain flavors longer.
- Insulation: Some bladders and tubes include insulation to slow freezing in cold weather. These are worth the investment if you hike in shoulder seasons or at altitude.
Choosing the Right Bottle
If you prefer bottles, consider these options:
- Hard-sided plastic (e.g., Nalgene): Lightweight (6-7 oz), durable, BPA-free, wide mouth for easy cleaning. The default choice for most hikers.
- Stainless steel (e.g., Hydro Flask, Klean Kanteen): Heavier (12-16 oz) but provides insulation and virtually indestructible construction. Best for hot weather or when you want cold water all day.
- Collapsible soft bottles (e.g., Platypus, CNOC): Ultra-lightweight (1-2 oz), packable when empty, but less durable and harder to clean. Best for ultralight setups or as emergency backup.
- Smart water bottles: Standard 1-liter bottles that fit perfectly in pack side pockets. Extremely lightweight but not designed for rugged outdoor use. Popular as budget options.
Hydration Best Practices for Hiking
Regardless of your delivery system, these hydration practices will keep you performing at your best:
- Pre-hydrate: Drink 16-20 ounces of water in the hour before starting your hike. Starting well-hydrated gives you a buffer.
- Sip frequently: Small sips every 15-20 minutes maintain hydration better than large amounts at long intervals.
- Add electrolytes: For hikes lasting more than 2-3 hours or in hot conditions, add electrolyte tablets or powder to at least one water bottle. Sodium, potassium, and magnesium replace minerals lost through sweat.
- Monitor urine color: Light yellow indicates proper hydration. Dark yellow or amber signals dehydration that requires immediate attention.
- Know your water sources: Before your hike, research available water sources along the route. Carry purification tablets or a filter if you plan to refill from natural sources.
- Adjust for conditions: Heat, altitude, wind, and exertion level all increase water needs. Carry extra water for unexpected delays or route changes.
Advanced Hydration Strategies for Extended Trips
For multi-day backpacking trips, hydration management becomes a logistical challenge that goes beyond simply choosing a bladder or bottle. You need to plan your water sources, calculate daily consumption, and carry purification methods to refill from natural sources along the trail. Your hydration system must integrate seamlessly with your overall water management strategy.
The most effective approach for multi-day trips is the "drink, filter, repeat" method. Use your hydration bladder as your primary drinking system throughout the hiking day, consuming 3-4 liters during active hours. When you reach a reliable water source at camp, refill both your bladder and your bottles. Use a water filter or purification tablets to treat water from natural sources. This approach allows you to carry a minimal amount of water between sources while maintaining constant hydration throughout the trip.
Calculating Daily Water Needs
Your daily water requirement depends on temperature, exertion level, altitude, and individual physiology. As a baseline, plan for 3-4 liters per day in moderate conditions (60-75 degrees Fahrenheit, moderate exertion). In hot conditions (above 85 degrees), increase this to 4-6 liters per day. At high altitude (above 8,000 feet), add an additional liter due to increased respiratory water loss. These calculations help you plan your water source stops and determine how much carry capacity you need between reliable sources.
Water Source Planning
Before your trip, research available water sources along your route using trail guides, mapping apps, and recent trip reports. Mark reliable sources on your map and calculate the distance between them. If gaps between sources exceed your carry capacity (typically 3-4 liters for a full bladder plus one bottle), plan for water caching or adjust your daily mileage accordingly. In desert environments, water source reliability is the primary safety concern, and carrying extra capacity is non-negotiable.
Hydration System Maintenance Checklist
Regardless of whether you use a bladder, bottles, or both, regular maintenance keeps your system functional and safe. Follow this maintenance schedule for optimal performance:
- After every use: Rinse your bladder with warm water and hang to dry completely. Rinse bottles and allow to air dry upside down.
- Weekly (during active hiking season): Clean bladder interior with baking soda solution or dedicated cleaning tablets. Run a pipe cleaner through the drinking tube. Inspect bite valve for wear and replace if leaking.
- Monthly: Deep clean with diluted bleach solution (1 teaspoon per liter of water). Fill bladder, let sit 30 minutes, drain completely, rinse thoroughly. Inspect all seams and connections for signs of wear or micro-leaks.
- Before storage: Ensure bladder is completely dry. Store open in a clean, dry location. Some hikers store bladders in the freezer to prevent mold growth between uses. Never store with water inside, even briefly.
- Annually: Replace drinking tube and bite valve assembly. Inspect bladder seams for fatigue cracks. Replace bladder if any seam shows signs of separation or if the material has become cloudy or stiff.
Hydration Accessories Worth Considering
Several accessories enhance your hydration system performance and convenience on the trail:
- Inline water filters: Devices like the Sawyer Squeeze or Katadyn BeFree attach inline to your hydration tube, allowing you to drink directly from water sources without stopping to fill your bladder. This saves time and eliminates the need to carry excess water between sources.
- Insulated tube covers: These foam or neoprene sleeves fit over your drinking tube and prevent freezing in cold weather. They also keep water cooler in hot weather. An essential accessory for three-season and winter hiking.
- Magnetic tube clips: These clips attach the drinking tube to your shoulder strap with a magnetic connection, keeping the bite valve accessible and preventing it from swinging. They provide one-handed operation that is faster than traditional clip systems.
- Collapsible bottle carriers: For hikers who want bottle flexibility without sacrificing pack organization, collapsible carriers hold bottles securely in side pockets and compress when the bottle is removed.
- Electrolyte delivery systems: Single-serving electrolyte packets allow you to add minerals to your water without carrying bulky containers. Brands like Nuun, Liquid IV, and LMNT offer lightweight, effective electrolyte supplementation for long hiking days.
Making Your Decision
The bladder versus bottle decision is personal and depends on your hiking style, climate, trip duration, and maintenance habits. If you hike frequently in moderate conditions and value hands-free convenience, invest in a quality bladder and commit to a cleaning routine. If you prioritize simplicity, reliability, and easy maintenance, bottles are the better choice. If you want maximum flexibility and redundancy, use both.
Whichever system you choose, ensure your backpack is truly hydration-compatible with a well-designed sleeve, reliable hose port, and accessible bottle pockets. The right pack combined with the right hydration strategy turns water from a logistical concern into an automatic part of your hiking rhythm, keeping you hydrated, performing well, and enjoying every mile.