Choosing a Commuter Backpack for Cycling: Fit, Stability and Visibility
For a cycling commute of 5-15 km each way, the right backpack sits high on the back with its base above the sacrum, holds 18-26 litres, clears the helmet when you look up, and stays put when you stand on the pedals. Volume matters far less than stability: a 20 L pack carrying 5 kg without sway is safer than a 30 L pack whose load shifts on every pedal stroke.
This guide covers pack height against riding posture, load stability and pedal clearance, harness geometry for a forward-leaning torso, spray resistance, night visibility, laptop protection against road vibration, and where a helmet and lock go. It closes with a fit checklist and the specification points used for corporate cycling-commute programmes.
Backpack or Pannier: Choosing the Load Position
The first decision is whether the load rides on you or on the bike. A backpack keeps the load's centre of mass close to your own, which helps when you are out of the saddle, and it comes with you when you lock the bike. A pannier removes weight from the back entirely and is the better answer above roughly 7 kg, or on rides longer than about 40 minutes where a loaded back starts to fatigue. Panniers also change how the bike handles when you are off it and pushing up a ramp, which is worth a trial before committing. Convenience usually wins below 5 kg and comfort wins above it, so the decision is mostly about your honest load.
Weight on the back also raises the combined centre of gravity, which affects braking and low-speed balance. On a loaded 6 kg pack, the rider plus bike centre moves up by roughly 30-40 mm, which is enough to be felt in an emergency stop. Below 5 kg and 30 minutes, a backpack is fine and far more convenient; above that, racks and panniers are worth the fittings and the cost. Riders on a folding bike or a frame with no rack mounts often have no real choice, so harness quality matters more for them. For those riders, a well-set harness with a sternum strap is worth more than any luggage system they cannot fit.
| Ride profile | Recommended load position | Reason |
|---|---|---|
| Under 5 km, under 4 kg | Backpack | Speed and convenience win |
| 5-15 km, 4-6 kg | Backpack with sternum strap | Stable if the load is compressed |
| Over 15 km, over 6 kg | Pannier or rack bag | Removes fatigue from the back |
| Mixed train and bike | Backpack | Carries through the interchange |
Pack Height and Riding Posture
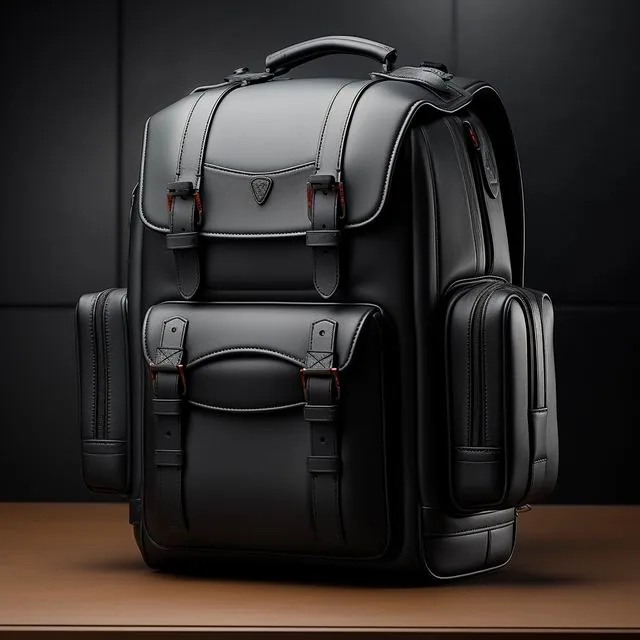
A riding torso is not a standing torso. On a flat-bar hybrid or a road bike the back is inclined 30-45 degrees from vertical, so a pack that fits when you are standing can foul the helmet the moment you lift your head to look ahead. The practical rule is a pack height of 42-48 cm for a rider of average build, with the top of the pack below the base of the helmet shell. On an upright city bike the posture is closer to standing, so the same pack can be 4-6 cm taller before it becomes a problem. Riders on drop bars should measure on the tops and the hoods, because the two positions differ by several degrees.
Width matters as much as height. A pack wider than the shoulders catches the wind and interferes with arm movement when you signal; 26-30 cm suits most riders. Depth is the dimension to keep low: a deep pack pushes the load away from the back and creates a lever that pulls the shoulders backwards on every climb. Aim for a shallow, wide, short pack rather than a tall narrow one. A shallow pack also keeps the load nearer your centre of mass, which makes low-speed manoeuvres in traffic noticeably easier. Measure the pack empty and loaded, since a soft pack grows by 20-30 mm in depth once it is filled.
- Pack height 42-48 cm, top of pack below the base of the helmet shell.
- Width 26-30 cm: wider than the shoulders catches wind and blocks signalling.
- Keep depth low; a deep pack levers the shoulders backwards when climbing.
- Base of the pack should sit above the sacrum, not on it.
Load Stability and Pedal Clearance
Sway is the real hazard, not weight. At a cadence of 80-90 revolutions per minute the torso moves slightly on every stroke, and an uncompressed load inside a pack resonates with that movement, building amplitude over the first minute. A sternum strap and two compression straps remove most of it by holding the load against the frame panel, which is why these two features matter more than padding density on a bike. If a pack has only one compression strap, treat sway control as a compromise and keep the load under about 4 kg. Riders who stand frequently on climbs should prioritise compression over capacity when choosing between two otherwise similar packs.
Pedal clearance is the other geometric check. When you stand on the pedals, the hips rotate and the pack base can drop towards the saddle; if the pack is long and soft, the base can contact the saddle nose and shift the whole load sideways. With the bike stationary, stand on the pedals and have someone check that the pack clears the saddle by at least 40 mm at full stand. Frame bags and saddle bags are worth considering for the lock alone, since they remove the heaviest irregular item entirely. A 1.5 kg lock removed from the pack changes how the load behaves more than any harness adjustment.
- Fit a sternum strap and use it; it cuts sway more than any padding change.
- Use both compression straps to pull the load towards the back panel.
- Heavy items go high and close to the back, light items low and forward.
- Check 40 mm of clearance above the saddle nose when standing on the pedals.
Harness Geometry for a Forward Lean
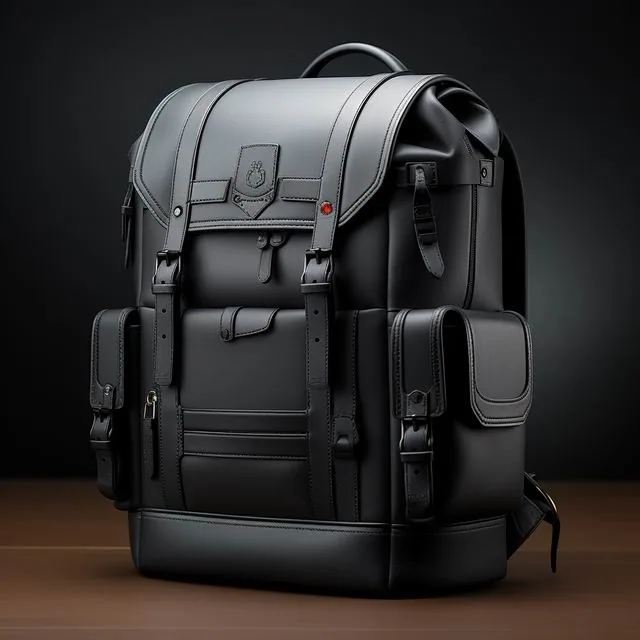
Strap angle decides where the load sits. On a walking pack, straps leave the top of the shoulder almost vertically; on a riding pack they should anchor 30-50 mm lower and wider so the load rides over the shoulder blades rather than pulling the shoulders back. Look for S-shaped straps rather than straight ones, and for a sternum strap that can slide over a 120 mm range so it can be set just below the collarbone. Try both positions on a short ride before deciding; a strap set 20 mm too high will rub the collarbone within a week. Straps should also be narrow enough at the neck to clear a helmet strap without rubbing against it.
Hip belts behave differently on a bike. A padded hip belt that works on a hill walk can foul the hip flexors when pedalling, so cycling commuters are usually better served by a slim 25 mm webbing belt that stabilises without transferring load. If the pack has a padded belt, check that it can be removed or rolled out of the way before you buy, and set the sternum strap to carry the stabilising role instead. Riders with a longer torso should check that the belt sits above the hip bone rather than on it, or it will chafe on longer rides. Some riders remove the belt entirely in summer and refit it for winter layers, which is a reasonable compromise.
Spray, Seat-Tube Wash and Waterproofing
Rain is only half the water problem on a bike; the other half is spray thrown up by the rear wheel and the seat tube, which is why the lower third of a cycling pack gets wet even on a dry-looking road after a shower. A shell fabric with a hydrostatic head of 5,000 mm or more handles rain; the base panel is what needs attention, because it sits in the spray line and takes abrasive grit at the same time. Mudguards reduce the problem substantially, so fit them before spending money on a more waterproof pack. The spray line is roughly the lower third of the pack, which is where wet linings almost always begin.
Specify the base separately from the shell. A 900D or 1000D polyester base with a TPU laminate resists both the water and the grit, and abrasion resistance should be checked against a named cycle count rather than a denier number - the reference method is ISO 12947, with 20,000 cycles a sensible floor for a pack that lives on a bike. A fitted rain cover adds about 120 g and solves spray better than any coating. Covers with a reflective panel do double duty in winter, which is the season when spray and darkness arrive together. Covers also pack down to the size of a fist, so they cost no usable space.
- Shell: 5,000 mm hydrostatic head or more for sustained rain.
- Base: 900D-1000D with a TPU laminate, tested to 20,000 cycles to ISO 12947.
- A rain cover at about 120 g solves rear-wheel spray more effectively than coating.
- Dry the pack open; trapped spray water ruins linings within a week.
Night Visibility and Reflective Area
Between October and March in the UK, a commuting rider spends most of the working week riding in the dark, and a rider is much harder to see than a car. Reflective material works by returning light to its source, so placement matters more than total area: a strip on the moving parts - the lower back panel, the sides of the pack and the strap edges - reads as a moving human shape to a driver, while a single logo on the front panel does not. A rear light clipped to the pack adds more conspicuity than any amount of trim, and costs about the same as a good reflective panel.
Reflective accessories for non-professional use are covered by a published performance standard, and buyers specifying reflective trim should ask for compliance with BS EN 13356 rather than accepting a general claim. As a working target, look for at least 150 square centimetres of retroreflective area distributed across three faces of the pack, and keep it clean: a film of road grime cuts returned light substantially. Wipe the trim with a damp cloth weekly in winter; road salt film cuts returned light more than most riders realise. Reflective trim works only when a headlight hits it, so treat it as a supplement to a rear light rather than a replacement.
Laptop Protection Against Vibration
Road vibration is a different failure mode from a drop. A bicycle transmits continuous high-frequency input through the pack to the machine, and a hard drive or a solder joint does not enjoy thousands of small cycles twice a day. Closed-cell foam of 6-8 mm in a suspended sleeve absorbs that input well; a thin padded sleeve against the back panel transmits almost all of it. Putting the machine in a slim sleeve inside the compartment adds a second isolation layer for very little extra weight. Vibration input is cumulative, so a daily rider should treat isolation as a specification rather than an optional extra on an expensive machine.
Suspension height is the specification to write down. A sleeve that stops 20-30 mm above the base of the pack keeps the machine off the hard point where vibration and impact meet. Add a simple rule for packing: laptop against the back panel, nothing rigid between the sleeve and the rider, and a D-lock in a separate compartment rather than pressed against the lid. If the route includes cobbles or a canal towpath, consider a pannier instead; no sleeve removes that input entirely. If a pannier is not an option, choose a smoother route on laptop days and keep the speed moderate over rough ground.
Helmet, Lock and Wet Kit
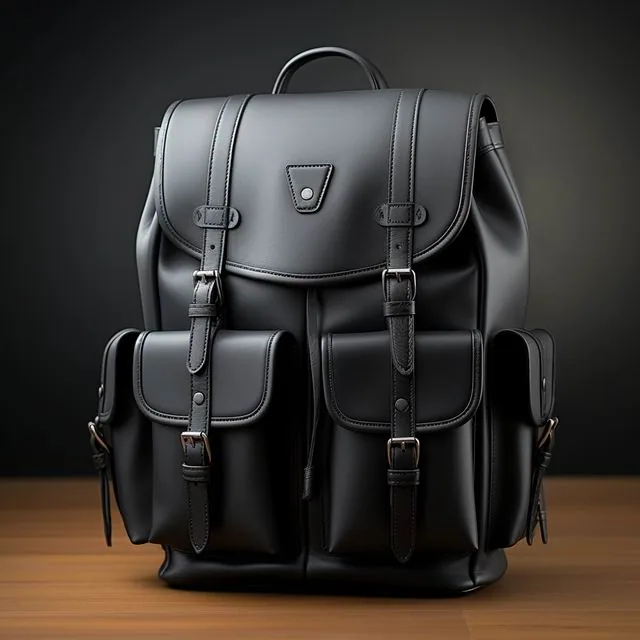
The awkward items on a cycling commute are the helmet and the lock, both of which are heavy, irregular and filthy. A helmet needs roughly 6-8 L of space and will not compress, so a pack that swallows one without distorting the panel is worth more than an extra 3 L of soft capacity. External helmet nets work but catch wind and collect rain; an internal sleeve or two compression straps over the lid is tidier. Check that helmet straps cannot catch in a zip; a strap snagged at a junction is a hazard rather than an inconvenience. Straps hanging outside a pack also collect road spray, which then runs down the back panel.
A D-lock weighs 1.0-1.8 kg and should be carried low and centred, in its own compartment if the pack has one, because it is the item most likely to bruise a laptop or tear a liner. Wet kit - a soaked jacket or overshoes - needs separation from everything else. A welded wet pocket or a single dry bag inside the main compartment costs about 40 g and keeps the rest of the load dry. Dry the wet pocket open at the end of the day, otherwise a welded liner will smell within a week of regular use. A wet pocket large enough for a jacket and overshoes, at 4-5 litres, covers most winter commutes.
- Helmet: 6-8 L of incompressible space, carried high or strapped to the lid.
- D-lock: 1.0-1.8 kg, low and centred, never against the laptop.
- Wet kit: welded pocket or one dry bag, about 40 g, keeps the load dry.
- Keep a small microfibre cloth for the spray film on the base panel.
Fit Checklist Before You Commit
Test the pack on the bike, not in a shop mirror. Load it to your real commuting weight - most riders underestimate and pack 4 kg while claiming 2 kg - then ride two minutes including one standing climb and one hard stop. If the pack shifts on the climb, tighten the compression straps before blaming the harness; if it pulls the shoulders back on the stop, the load is too deep. Then repeat the test wearing a jacket, because winter layers change the harness geometry more than most riders expect. Ride the same loop for both tests so the comparison is fair, and keep the load identical between runs.
Then run the static checks: helmet clearance when looking ahead, 40 mm of clearance over the saddle nose when standing, and no contact between the pack base and the sacrum. Finally, check that you can reach a bottle or a phone without removing the pack, because fumbling at a junction is the least safe moment of the whole commute. If the pack fails any of these, adjust before replacing: most fit problems on a bike are strap and load problems, not design faults. A pack that fails every adjustment is the wrong shape for your back, and no amount of strap tuning fixes a geometry mismatch.
| Check | Target | Fail sign |
|---|---|---|
| Helmet clearance | Pack top below helmet base | Contact when looking ahead |
| Saddle clearance | 40 mm at full stand | Base drags on the saddle nose |
| Sway test | No shift over a 20-second climb | Load oscillates with cadence |
| Shoulder pull | None under hard braking | Pack levers shoulders backwards |
Specifying a Cycling Commute Pack
For a corporate cycling-to-work scheme or a retail range, the specification should state the geometry, not the style. Useful written points are pack height and width limits, a 25 mm removable hip belt, a sliding sternum strap with 120 mm of travel, a base panel at 900D or above with a named abrasion cycle target, a retroreflective area of at least 150 square centimetres across three faces, and a suspended laptop sleeve with 20-30 mm of clearance below it. Add a stated cover weight and packed dimensions, because a cycling pack that will not fold into a locker is a problem at the office end.
QUANZHOU JUNYUAN BAGS runs every programme on fixed terms: MOQ 500 pcs per style and colourway, sampling in 6-10 working days (12-15 working days for complex builds), bulk in 35-50 days, AQL 2.5 inspection to ISO 2859-1, FOB Xiamen and T/T 30/70. The company was set up in 2014 and coordinates 4,950 square metres of SGS-verified production floor space with 137 colleagues and 7 production lines. Reflective trim area and placement should be drawn on the tech pack rather than described, so the sample can be checked against it. Sample approval should include a loaded ride test rather than a visual check, because stability cannot be judged on a table.
- State pack height and width limits so the design clears a helmet.
- Require a removable 25 mm hip belt and a sliding sternum strap with 120 mm of travel.
- Set retroreflective area at 150 square centimetres minimum across three faces.
- Geometry first, then the fixed terms: MOQ 500 pcs per style and colourway, sampling 6-10 working days, bulk 35-50 days.
Frequently Asked Questions
What size backpack is best for cycling to work?
For most commuters, 18-26 litres. That range swallows a 15-inch laptop, a change of clothes, a lunch box and a D-lock without becoming deep enough to lever the shoulders backwards. Height matters more than capacity: keep the pack at 42-48 cm so the top sits below the base of the helmet shell when you look ahead. Depth is the dimension to keep low, because a deep pack pushes the load away from your back.
Should I use a hip belt when cycling with a backpack?
A slim 25 mm webbing belt, yes; a padded load-transfer belt, usually no. Padded hiking belts foul the hip flexors when pedalling. Use the webbing belt for lateral stability and let the sternum strap do the stabilising work, then rely on compression straps to hold the load against the back panel. A removable belt is the best of both worlds if the pack also goes walking at weekends.
How do I stop a backpack swaying when I pedal?
Compress the load before anything else. Pull both compression straps so the contents sit against the back panel, set the sternum strap just below the collarbone, and carry heavy items high and close to your back. Sway builds because an uncompressed load resonates with torso movement at a cadence of 80-90 revolutions per minute. If it still moves, the load is too deep rather than too heavy.
Can a backpack damage a laptop on a bike commute?
Yes, through sustained vibration rather than a single impact. Use a suspended sleeve that stops 20-30 mm above the base of the pack, with 6-8 mm of closed-cell foam, and keep a D-lock out of the same compartment. Continuous high-frequency input twice a day is harder on solder joints and drives than one drop. A hard case in a pannier is the safest option for a daily rider with an expensive machine.
How much reflective area does a cycling backpack need?
Aim for at least 150 square centimetres of retroreflective material distributed across three faces, including the sides and the strap edges, so drivers read a moving human shape. Ask for compliance with BS EN 13356 rather than a general claim, and keep the trim clean, since road grime substantially cuts the light returned. Placement on moving parts matters as much as total area, so cover the sides and the strap edges too.
Is a rain cover better than a waterproof pack for cycling?
A rain cover of about 120 g is the better answer for cycling, because it handles rear-wheel and seat-tube spray, which soaks the lower third of the pack even when it is not raining. Use it alongside a shell rated at 5,000 mm hydrostatic head and a laminated base panel rather than relying on coating alone. Covers also keep road grit off the fabric, which reduces abrasion on the base panel.
Where should a D-lock go in a backpack?
Low and centred, ideally in its own compartment. A D-lock weighs 1.0-1.8 kg and has hard edges that bruise a laptop lid and tear linings. Never place it against a laptop sleeve, and keep it away from the back panel where it will press into your spine under braking. A dedicated lower compartment is worth asking for, because it keeps the lock away from everything fragile.
How do I carry a helmet in a commuter backpack?
A helmet needs 6-8 L of incompressible space, so check the pack can take one without distorting the panel. Internal options are tidier: a dedicated sleeve or two compression straps over the lid. External helmet nets work but catch wind and collect rain, which then runs into the pack through the net's attachment points. Measure the packed height of the helmet before buying, since the shape is awkward rather than large.
At what load should I switch from a backpack to panniers?
Around 6-7 kg, or about 40 minutes of riding. Above that, a loaded back fatigues and the raised centre of gravity affects braking and low-speed balance; a 6 kg pack lifts the rider and bike centre of mass by roughly 30-40 mm. Below 5 kg and 30 minutes, a backpack is faster through the interchange. Riders with an existing back problem should make the switch earlier, at around 4 kg.
How tight should a cycling backpack be packed?
Tight enough that nothing moves when you shake the pack, and no tighter. Use both compression straps to flatten the load against the back panel, then close the sternum strap so the shoulder straps sit 30-50 mm wider than a walking fit. Over-compressing distorts the panel and pushes the load away from your back, which increases the lever arm. Judge the feel after a minute of riding rather than standing still in a hallway.
What should a corporate cycle-to-work scheme specify in a pack?
Geometry and hardware: pack height 42-48 cm and width 26-30 cm, a removable 25 mm hip belt, a sliding sternum strap with 120 mm of travel, a 900D or higher base with a named abrasion cycle target to ISO 12947, 150 square centimetres of retroreflective trim across three faces, and a suspended laptop sleeve with 20-30 mm clearance. Add a rain cover as standard, because it solves spray more cheaply than any fabric upgrade.
Develop a Cycling Commute Pack Range
Since 2014, QUANZHOU JUNYUAN BAGS has run as a sourcing and programme-management company, coordinating 4,950 square metres of SGS-verified production floor space with 137 colleagues and 7 production lines. Our team develops cycling commuter packs against buyer-written specifications covering geometry, base fabric, reflective trim and hardware.
Every programme runs on the same terms: MOQ 500 pcs per style and colourway, sampling in 6-10 working days (12-15 working days for complex builds), bulk production in 35-50 days, AQL 2.5 inspection to ISO 2859-1, FOB Xiamen and T/T 30/70. Send a tech pack or reference sample and the team will return a costed specification.
Email: service@junyuanbags.com
WhatsApp: +86 177 5002 0688