Outdoor Gear Maintenance: Extend Your Equipment's Life
Quality outdoor gear represents a significant investment. A well-made backpack costs GBP 100 to 250, hiking boots GBP 120 to 250, and a quality tent GBP 200 to 600 or more. These items are engineered to perform in demanding conditions, but their longevity depends almost entirely on how you maintain them. Neglected gear deteriorates rapidly: waterproof coatings fail, zippers jam and break, fabrics develop mould, and structural elements weaken until the item becomes unreliable or unusable. Proper maintenance, by contrast, can double or even triple the useful life of your outdoor equipment.
This comprehensive guide covers the maintenance protocols for every major category of outdoor gear. From cleaning techniques and storage best practices to repair methods and seasonal deep-clean schedules, you will find actionable instructions that keep your equipment performing at its best for years to come. The time invested in maintenance pays returns in reliability, performance, and avoided replacement costs.
The Maintenance Mindset: Treat gear maintenance like vehicle servicing. Small, regular attention prevents major failures. A five-minute cleaning session after each use and a thorough seasonal check-up cost a fraction of the time and money required to replace neglected gear. Build maintenance habits into your post-trip routine rather than treating it as an occasional chore.
Backpack Care and Cleaning
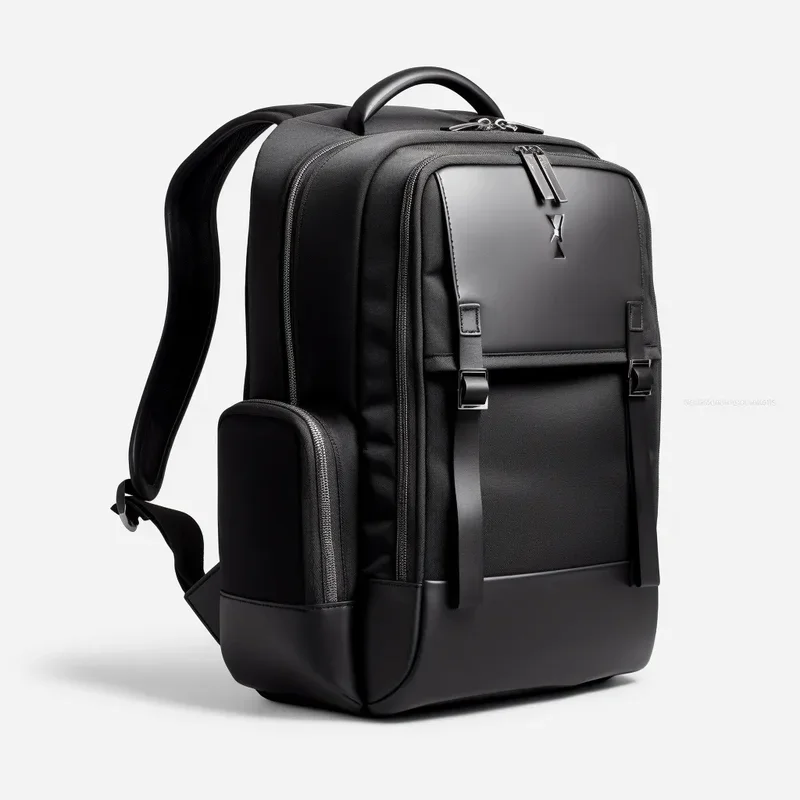
Your backpack endures the most abuse of any piece of outdoor equipment. It carries loads across rough terrain, gets set on wet ground, and is exposed to sun, rain, and abrasion. Despite this, proper care keeps a quality backpack functional and attractive for a decade or more.
After Every Trip
Step 1: Empty and Inspect
Empty every compartment, including small pockets where debris accumulates. Turn the bag inside out if possible to shake out crumbs, dirt, and organic matter. Inspect for tears, abrasion spots, loose stitching, and zipper issues while the problems are still small and easily repairable.
Step 2: Spot Clean
Use a damp cloth with mild soap to wipe down dirty areas. Focus on the bottom panel, shoulder straps, and hip belt where sweat and dirt accumulate. Never machine wash your backpack; the agitation damages waterproof coatings, weakens seams, and can break the internal frame structure.
Step 3: Dry Completely
Open all zippers and compartments and hang the backpack in a well-ventilated area away from direct sunlight. Ensure complete dryness before storing; residual moisture causes mould growth and fabric degradation that can destroy a backpack from the inside out.
Deep Clean (Seasonal)
At the start or end of each season, give your backpack a thorough cleaning. Fill a basin or bathtub with lukewarm water and a technical gear cleaner (Nikwax Tech Wash or Grangers Performance Wash work excellently). Submerge the pack and gently agitate, paying attention to heavily soiled areas with a soft brush. Rinse thoroughly until water runs clear. Hang to dry completely with all compartments open.
Waterproofing Refresh
When water stops beading on your backpack's surface, it is time to reapply DWR (Durable Water Repellent) treatment. Clean the pack first, then apply a spray-on DWR treatment like Nikwax Tent and Gear Proof or Grangers Clothing Repel Plus. Apply evenly while the fabric is slightly damp, allow it to penetrate for the recommended time, then air dry. Test the treatment by sprinkling water on the fabric; if it beads and rolls off, the treatment is effective.
Boot Care and Maintenance
Hiking boots are your most critical piece of equipment. Properly maintained boots provide years of reliable service; neglected boots cause blisters, fail on the trail, and require premature replacement.
After Every Hike
Remove laces and insoles. Brush off mud and debris with a stiff brush. If heavily soiled, rinse with clean water. Stuff with newspaper to absorb internal moisture and maintain shape. Air dry at room temperature; never place boots near a fire, radiator, or heater, as excessive heat cracks leather and separates glued components.
Conditioning and Waterproofing
Leather boots require conditioning every four to eight hikes, depending on conditions. Apply a leather conditioner appropriate to your boot type: wax-based products like Grangers G-Wax provide maximum waterproofing for full-grain leather, while lighter conditioners suit nubuck and synthetic materials. Allow conditioner to penetrate fully, then buff off excess. Reapply waterproofing treatment when water no longer beads on the boot surface.
Sole and Stitching Inspection
Regularly check the bond between the sole and upper. Small separations can be repaired with shoe glue (Gear Aid Freesole or similar). Worn lugs reduce traction significantly; when tread depth approaches 2mm, consider resoling if your boots are resoleable. Inspect stitching for fraying or broken threads; early repair prevents larger failures.

Tent Care
A quality tent protects you from the elements and represents one of your most expensive pieces of equipment. Proper maintenance preserves its waterproof integrity and structural strength for years.
Cleaning Protocol
Set up the tent or spread it on a clean surface. Sponge clean with lukewarm water and a technical fabric cleaner. Never use washing machines, dish soap, or detergents that strip waterproof coatings. For mould spots, use a specialised tent cleaner or a solution of white vinegar and water. Rinse thoroughly and air dry completely in shade. Direct sunlight during drying degrades fabric coatings and weakens nylon fibres over time.
Seam Sealing
Factory seam tape degrades over time, especially with frequent use and UV exposure. When you notice water seeping through stitch holes during rain, it is time to reseal. Apply seam sealer (Gear Aid Seam Grip or McNett SilNet for silicone-coated fabrics) along all interior seam lines. Allow to cure fully before the next use. This process takes 30 to 60 minutes and extends your tent's waterproof performance by years.
Storage Best Practices
Never store a tent while damp or dirty. Ensure complete dryness before packing. For long-term storage, hang the tent loosely or store it in a large cotton bag that allows airflow. Avoid compressing it in its stuff sack for months at a time; continuous compression damages the fabric coating and weakens pole shock cords. Store poles separately in their bag, and keep stakes organised in a dedicated container.
Clothing Care: Layers and Waterproofs
Technical outdoor clothing requires specific care to maintain its performance properties. Incorrect washing destroys the very features you paid premium prices for.
Waterproof Jackets and Trousers
Wash technical waterproofs with a specialised cleaner like Nikwax Tech Wash. Standard detergents leave residue that blocks the fabric's breathable membrane and destroys DWR coatings. Wash on a gentle cycle at the temperature specified on the care label. Rinse twice to ensure all cleaner is removed. Reapply DWR treatment after washing using either a spray-on or wash-in product. Tumble dry on low heat or iron on low through a cloth to reactivate the DWR treatment.
Insulated Jackets (Down and Synthetic)
Down jackets require careful washing to maintain loft and warmth. Use a front-loading washing machine (top-loaders with agitators damage down clusters) with a down-specific cleaner. Add clean tennis balls or dryer balls to the tumble dryer on low heat to break up down clumps and restore loft. This process may require multiple drying cycles. Synthetic insulated jackets are more forgiving but still benefit from technical cleaner and gentle washing.
Base Layers (Merino Wool and Synthetic)
Merino wool base layers should be washed in cold water with a wool-specific detergent. Avoid fabric softeners that coat fibres and reduce moisture-wicking performance. Air dry flat to maintain shape. Synthetic base layers wash in warm water with standard sport detergent and can be tumble dried on low. Both types benefit from anti-odour treatments for extended multi-day use.
Zipper Maintenance
Zippers fail more often than any other component on outdoor gear. Most failures result from dirt accumulation and lack of lubrication rather than mechanical defects.
| Problem | Solution | Prevention |
|---|---|---|
| Sticky or stiff zipper | Clean teeth with brush, apply zipper wax or silicone lubricant | Lubricate every 3 months |
| Zipper won't close | Check for fabric caught in teeth, realign teeth manually | Clear debris regularly |
| Slider comes off track | Stop at bottom, realign teeth, gently guide slider back on | Never force past resistance |
| Pull tab broken | Replace with paracord or keyring | Reinforce with tape if showing wear |
| Teeth separated | Pinch slider with pliers gently to tighten grip on teeth | Avoid overstuffing bags near zippers |
Keep a small zipper maintenance kit in your gear: zipper wax sticks, a small pair of pliers, spare pull tabs, and a tube of fabric glue for emergency seam repairs. This kit weighs under 100 grams and handles the most common field failures.
Seasonal Deep Clean Schedule
Organise your gear maintenance around the seasons to ensure nothing falls through the cracks:
Spring (pre-summer season): Deep clean all backpacks, inspect and repair tents, re-waterproof jackets and boots, check sleeping bag loft, clean and treat all footwear. Test all zippers and lubricate as needed. Replace any items that cannot be repaired.
Autumn (pre-winter season): Deep clean summer gear before storage. Inspect and prepare cold-weather clothing. Check insulation loft in jackets and sleeping bags. Clean and waterproof winter boots. Test all lighting equipment and replace batteries. Ensure first aid supplies are current.
Post-trip routine (every trip): Clean, dry, and inspect all gear within 48 hours of returning. Repair minor damage immediately while you remember where it occurred. Restock consumables (waterproofing spray, batteries, first aid supplies). Return gear to its designated storage location.
When to Repair vs. Replace
Understanding the boundary between repairable damage and terminal wear saves money and reduces waste. As a general rule, localised damage to quality gear is almost always worth repairing, while widespread deterioration signals replacement time.
Repair: Small fabric tears (use adhesive patches or sewing), broken zippers (replace slider or entire zipper), separated sole edges (re-glue with shoe adhesive), worn seam tape (re-seal), broken buckle (replace with aftermarket), torn strap (sew or replace).
Replace: Delaminating waterproof membrane (irreversible), extensively worn outsole with no remaining tread, fabric that has lost structural integrity throughout (not just in one area), frame damage on backpacks that compromises load-bearing, and insulation that no longer lofts despite proper washing.
Essential Repair Kit for the Field
Carrying a compact repair kit on multi-day trips enables you to address problems before they escalate into gear failure far from any shop or service centre. Your field repair kit should include: adhesive fabric patches in multiple colours, a needle and strong thread (or dental foss in a pinch), gear-specific glue like Seam Grip or Shoe Goo, duct tape wrapped around a pencil to save space, a small roll of tenacious tape for emergency fixes, safety pins, zip ties, and a spare buckle or two.
Practice basic repair techniques at home before you need them in the field. Learn to sew a simple running stitch for fabric tears, apply adhesive patches correctly by cleaning the surface first and allowing full cure time, and re-thread paracord through zipper pulls. These skills take minutes to learn and could save your trip when equipment fails kilometres from the nearest repair shop.
Frequently Asked Questions
How do I clean a hiking backpack properly?
Empty all compartments, hand wash in lukewarm water with technical gear cleaner, spot clean with a soft brush, rinse thoroughly, and air dry completely with all zippers open. Never machine wash.
How often should I re-waterproof my gear?
When water stops beading on the surface, typically after 10-15 heavy uses or at the start of each season. Clean first, then apply DWR spray or wash-in treatment and test for effectiveness.
How should I store outdoor gear between seasons?
Clean and dry completely. Store in a cool, dry, dark place. Hang backpacks and jackets. Never store in plastic bags; use cotton or mesh that allows airflow. Check periodically for mould.
How do I maintain zippers on outdoor gear?
Clean teeth with a soft brush, lubricate with zipper wax or silicone spray every few months. Never force a stuck zipper. Use graphite pencil for quick field fixes. Replace broken pull tabs with paracord.
When should I repair vs. replace gear?
Repair localised damage: small tears, broken zippers, separated soles, worn seams. Replace when there is widespread deterioration: delaminating membranes, extensively worn soles, or structural failure throughout.
How do I care for hiking boots?
Clean after every hike with brush and water, air dry naturally, condition leather every 4-8 hikes, apply waterproofing when needed, inspect soles and stitching regularly, and store with boot trees or paper to maintain shape.
What is the best way to clean a tent?
Sponge clean with lukewarm water and technical fabric cleaner. Never use machines or detergents. Rinse thoroughly, air dry in shade, and reapply seam sealer to worn areas before storage.
Durable Outdoor Bags, Built to Last
We manufacture outdoor backpacks with premium materials, reinforced stress points, quality YKK zippers, and durable water-repellent coatings that stand up to years of adventure. Custom branding and OEM partnerships available for outdoor brands.
Email: service@junyuanbags.com
WhatsApp: +86 17750020688